


Hey everyone, this is Brittany with the latest progress entry. I just returned a few days ago from a family vacation. We were visiting my sister who is in the Air Force. She is stationed in Virginia, so we drove there to spend the week with her.
As normal you will see an update of how many projects we have completed, started, or are still waiting to be started. If a project is still waiting it may have a name next to it. Some may not because a few of them we are going to decide on later. As in previous update posts if the project name is colored pink it is in progress by Brittany and if colored green it is in progress by Em. If the project name is colored and crossed out that means it is completed. We will also have Pattern Entries linked next to each project as we update the blog with our evaluations and input on each pattern.
As of June 27, 2011:
30/60 Projects - Completed
10/60 Projects - Works In Progess
20/60 Projects - Waiting to be Started
Pattern #1 Chain-Link Scarf (Brittany)
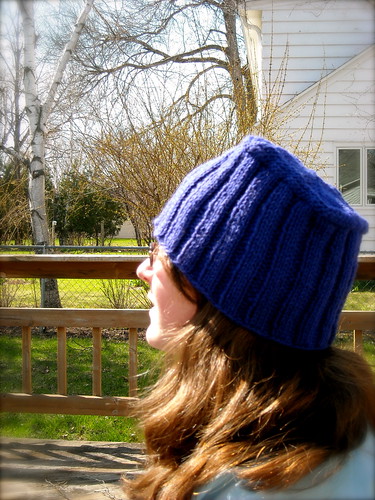
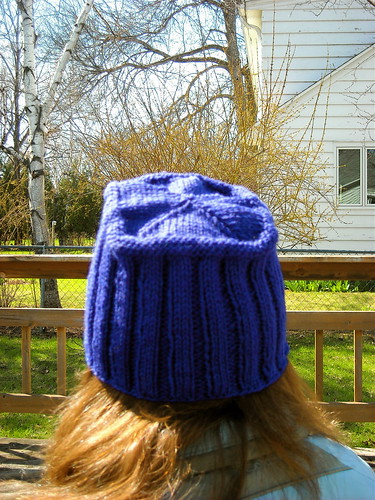
Pattern #2 Cable Brim Tam (Brittany)
Pattern #3 Waffle Mittens - Project Entry
Pattern #4 Puppy Mittens
Pattern #5 Tweed Watch Cap - Project Entry
Pattern #6 Tied Rectangle Wrap
Pattern #7 Embroidered Mittens
Pattern #8 Lion Scarf
Pattern #9 Monkey Hat (Em)
Pattern #10 Diagonal Stripes Hat
Pattern #11 Wave Scarf - Project Entry
Pattern #12 Cables & Wraps Scarf
Pattern #13 Ribbed Wristers - In Progress Project Entry
Pattern #14 Zigzag Scarf (Em)
Pattern #15 Striped Bobbled Hat (Brittany)
Pattern #16 Ribbed Bonnet (Em)
Pattern #17 Plaid Mittens
Pattern #18 Striped Graduated Scarf
Pattern #19 Twisted Toque
Pattern #20 Textured Triple-Stripe Scarf
Pattern #21 Birdcage Mittens
Pattern #22 Bobbles & Cables Cap - Project Entry
Pattern #23 Smocked Fingerless Mitts - Project Entry
Pattern #24 Mittered Scarf
Pattern #25 Ribbed Keyhole Scarf
Pattern #26 Basketweave Scarf - Project Entry
Pattern #27 Scalloped-Edge Beanie - Project Entry
Pattern #28 Reverse Stockinette Mittens
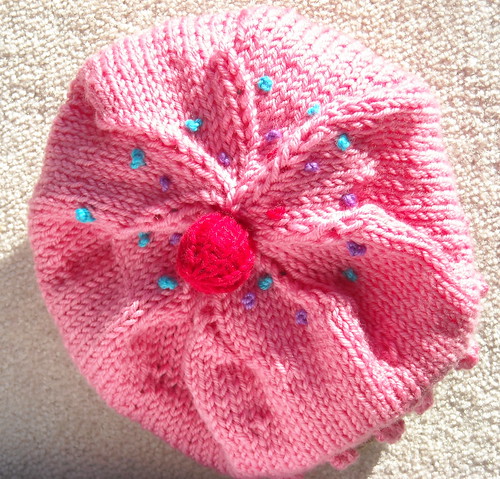
Pattern #29 Cupcake Hat (Brittany)
Pattern #30 Eyelet Scarf
Pattern #31 Garter-Ridged Hat
Pattern #32 Garter-Stitch Neck Wrap
Pattern #33 Pocket Cap
Pattern #34 Checkered Mittens - Project Entry
Pattern #35 Textured Tam - Project Entry
Pattern #36 Leaf Scarf
Pattern #37 Mock Cable Wristers - In Progress Project Entry Completed Project Entry
Pattern #38 Garter-Ridged Scarf
Pattern #39 Cables & Stripes Mittens - Project Entry
Pattern #40 Tweed Mittens - Project Entry
Pattern #41 Pocket Scarf
Pattern #42 Ribbed Pillbox - Project Entry
Pattern #43 Octopus Mittens (Brittany)
Pattern #44 Tasseled Topper (Em)
Pattern #45 Bunny Mittens - Project Entry
Pattern #46 Leaf-Lace Gauntlets (Em)
Pattern #47 Striped & Ruffled Wrap
Pattern #48 Starfish Hat - Project Entry
Pattern #49 Slip-Stitched Hat
Pattern #50 Ruffled Scarf (Brittany)
Pattern #51 Cabled-Cuff Mittens - In Progress Project Entry Completed Project Entry
Pattern #52 Cabled Scarf Hat - In Progress Project Entry Completed Project Entry
Pattern #53 Two-Color Slip-Stitched Hat - Project Entry
Pattern #54 Twisted-Rib Hat (Em)
Pattern #55 Triple-Cable Scarf
Pattern #56 Flip-Top Mittens
Pattern #57 Drop-Stitch Neck Wrap
Pattern #58 Spotted Fair Isle Mittens
Pattern #59 Hugs & Kisses Mittens - In Progress Project Entry Completed Project Entry
Pattern #60 Scandinavian Mittens
As normal you will see an update of how many projects we have completed, started, or are still waiting to be started. If a project is still waiting it may have a name next to it. Some may not because a few of them we are going to decide on later. As in previous update posts if the project name is colored pink it is in progress by Brittany and if colored green it is in progress by Em. If the project name is colored and crossed out that means it is completed. We will also have Pattern Entries linked next to each project as we update the blog with our evaluations and input on each pattern.
As of June 27, 2011:
30/60 Projects - Completed
10/60 Projects - Works In Progess
20/60 Projects - Waiting to be Started
Pattern #1 Chain-Link Scarf (Brittany)
Pattern #2 Cable Brim Tam (Brittany)
Pattern #6 Tied Rectangle Wrap
Pattern #8 Lion Scarf
Pattern #9 Monkey Hat (Em)
Pattern #10 Diagonal Stripes Hat
Pattern #12 Cables & Wraps Scarf
Pattern #13 Ribbed Wristers - In Progress Project Entry
Pattern #14 Zigzag Scarf (Em)
Pattern #15 Striped Bobbled Hat (Brittany)
Pattern #16 Ribbed Bonnet (Em)
Pattern #18 Striped Graduated Scarf
Pattern #20 Textured Triple-Stripe Scarf
Pattern #21 Birdcage Mittens
Pattern #29 Cupcake Hat (Brittany)
Pattern #30 Eyelet Scarf
Pattern #31 Garter-Ridged Hat
Pattern #32 Garter-Stitch Neck Wrap
Pattern #33 Pocket Cap
Pattern #36 Leaf Scarf
Pattern #43 Octopus Mittens (Brittany)
Pattern #44 Tasseled Topper (Em)
Pattern #46 Leaf-Lace Gauntlets (Em)
Pattern #47 Striped & Ruffled Wrap
Pattern #50 Ruffled Scarf (Brittany)
Pattern #54 Twisted-Rib Hat (Em)
Pattern #55 Triple-Cable Scarf
Pattern #57 Drop-Stitch Neck Wrap
Pattern #58 Spotted Fair Isle Mittens
Pattern #60 Scandinavian Mittens


